In today's digital world, our email inboxes are constantly bombarded with messages, from promotional offers and social media notifications to newsletters and work correspondence. This can quickly lead to a cluttered and overwhelming inbox. Tech expert Kurt Knutsson highlights the importance of email aliases as a valuable tool for organizing and streamlining your digital life, especially for professionals.
An email alias is essentially an alternate email address linked to your primary account. It allows you to receive emails under different names, which can be incredibly helpful for sorting messages, managing spam, and protecting your main email address. Let's explore how to create and use aliases on popular platforms like Gmail, Outlook, and iCloud.

Gmail Aliases
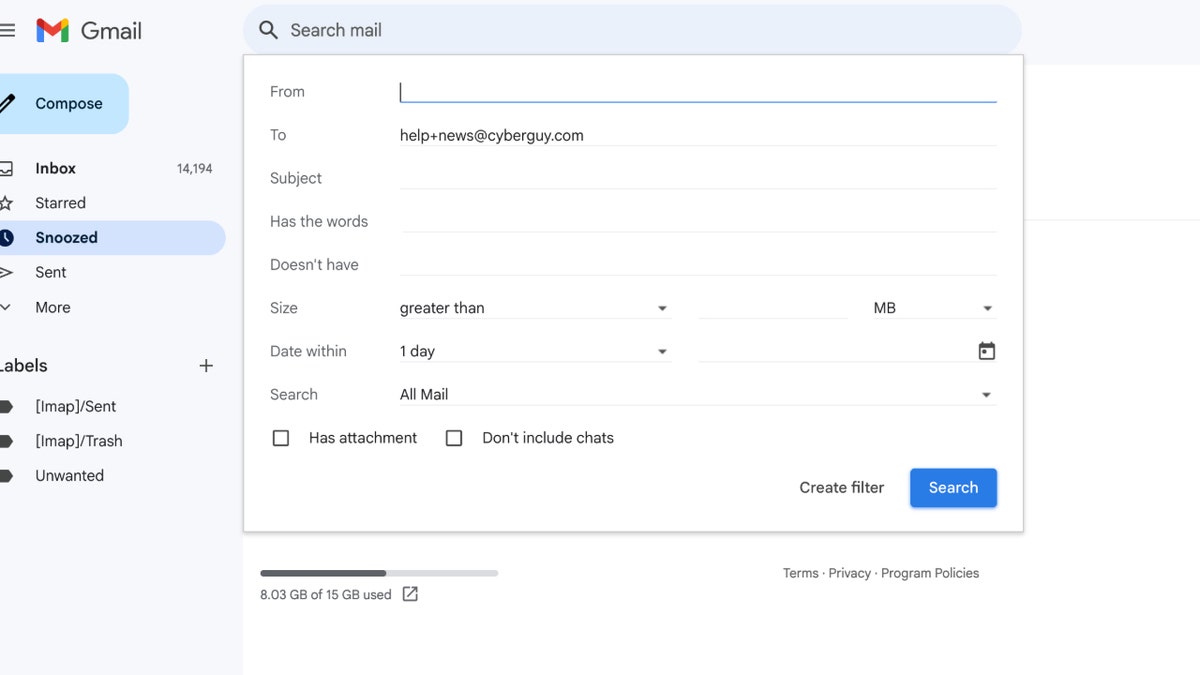
Gmail doesn't offer distinct aliases, but you can achieve similar functionality using the "+" trick or by adding dots to your address. While these methods don't create entirely separate addresses, they provide a useful way to filter and organize incoming mail.
The "+" Trick
Simply add a "+" followed by any keyword before the "@gmail.com" part of your address. For example, if your email is [email protected], you could use [email protected] for work-related emails, [email protected] for subscriptions, and so on. All emails sent to these variations will arrive in your primary inbox.
The Dot Trick
Gmail ignores dots in email addresses. This means you can use variations like [email protected] or [email protected], and all emails will still reach your main inbox.

Outlook.com Aliases
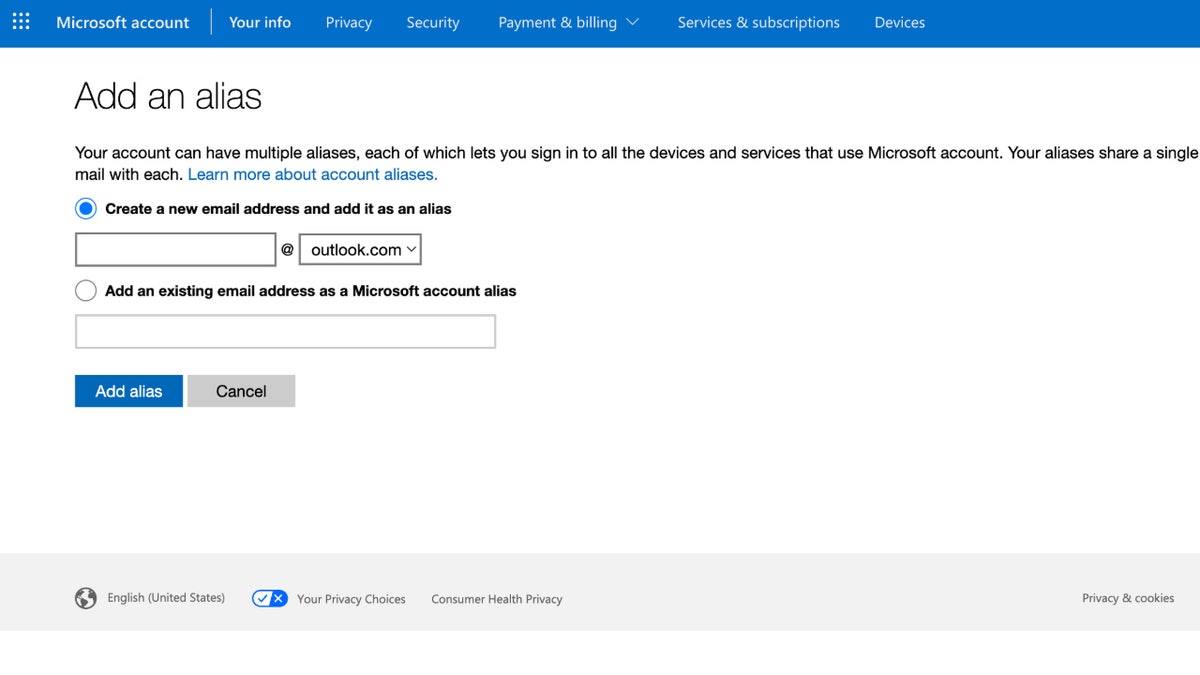
Outlook allows creating multiple aliases linked to your primary account. You can send and receive emails using any of these aliases, and they all land in your main inbox. This provides more flexibility than Gmail's workarounds.
To create an alias, navigate to Settings, then View all Outlook settings. Under Mail, click Sync email, then Manage or choose a primary alias. Select Add email and follow the prompts to create a new Outlook.com alias or use an existing email address.

iCloud Aliases
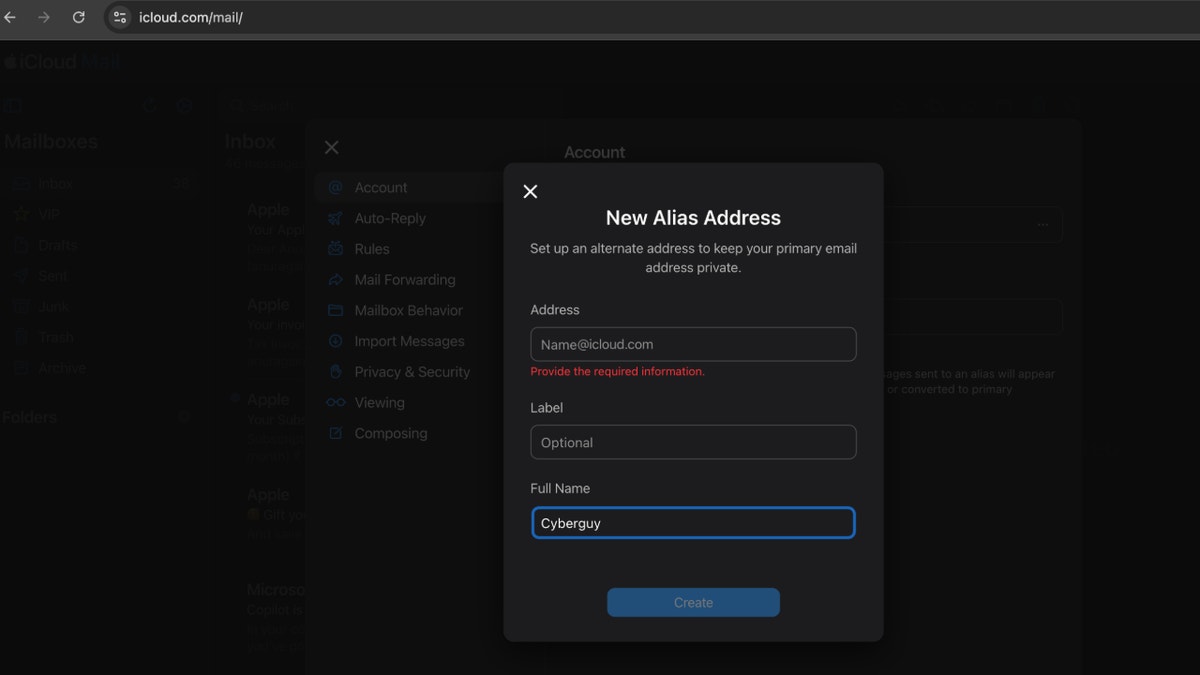
Apple allows you to create up to three email aliases associated with your Apple ID. These aliases function similarly to Outlook's, forwarding emails to your primary iCloud inbox. Go to icloud.com/mail, click the gear icon, then Settings. Choose Accounts and then Add Alias. Follow the instructions to set up your new alias.

Advanced Email Privacy
While these built-in alias features are helpful, they may not offer complete privacy. For enhanced security, consider dedicated private email services that provide robust alias management and advanced privacy features.
Beyond Aliases: Additional Inbox Protection
In addition to using aliases, implement these strategies for a secure inbox:
- Limit sharing your primary email address.
- Utilize spam filters effectively.
- Consider personal data removal services.
- Enable two-factor authentication.
- Exercise caution with suspicious links and attachments.
- Use strong antivirus software.
- Update your email password regularly.
By combining email aliases with proactive security measures, you can take control of your inbox and enjoy a more organized and secure digital experience.


